Metallographic mounting supports a specimen during grinding and polishing, protects critical edges, and provides a consistent shape for handling and automated preparation. The right method depends on the specimen’s tolerance for heat and pressure, the feature being measured, and the laboratory’s production requirements—not simply on how quickly a mount can be made.
For routine metal specimens that tolerate elevated temperature and pressure, hot compression mounting is often a practical option. For fragile assemblies, porous materials, temperature-sensitive specimens, or complex geometries, cold castable mounting may be more suitable. Where coating thickness, surface layers, or fine cracks are the inspection target, resin adhesion, shrinkage, and impregnation become central selection criteria. Cast epoxy systems generally offer better edge retention than cast acrylic systems because of their lower shrinkage and stronger adhesion to the specimen.
The objective is not an attractive resin puck. It is a supported, traceable specimen that survives preparation without losing the evidence needed for analysis.
This guide explains how to select metallographic mounting methods, resins, presses, and impregnation equipment; prevent gaps and bubbles; verify mount quality; and evaluate cost per acceptable specimen.
What Is Metallographic Mounting—and Does Every Specimen Need It?
Metallographic mounting embeds or mechanically supports a specimen so it can be prepared and examined reliably. Most resin-mounted specimens have a cylindrical shape containing the sample, with the required examination plane exposed during grinding.
Mounting helps solve a practical problem: the geometry of a component is rarely designed for laboratory preparation. A wire, coated fastener, thin sheet, porous coating, or irregular fragment may be difficult to hold without damaging it or changing its orientation.
What Is the Purpose of Mounting a Metallographic Specimen?
A suitable mount performs several functions:
-
Provides a manageable shape for handling and clamping.
-
Supports specimen edges during material removal.
-
Holds small components in the required orientation.
-
Stabilizes fragile or porous structures when an appropriate impregnation method is used.
-
Creates repeatable dimensions for automated preparation fixtures.
-
Provides space for identification and traceability.
For edge-sensitive work, the specimen–resin interface is especially important. A gap at that interface reduces support and can contribute to edge rounding during grinding and polishing. Cooling conditions, resin adhesion, and shrinkage therefore affect the final analytical surface—not just the appearance of the mount.
When Is Mounting Recommended?
Mounting is worth evaluating when the specimen is:
| Specimen or application | Main reason to consider mounting |
|---|---|
| Wire, foil, or miniature component | Improve handling and maintain orientation |
| Plated or coated part | Support the original edge and interface |
| Surface-hardened steel | Preserve the region used for layer-depth assessment |
| Porous material or thermal-spray coating | Support accessible pores and fragile features |
| Electronic assembly | Maintain the relationship between multiple materials |
| Irregular failure fragment | Hold a defined examination plane |
| Repeated production samples | Standardize fixture compatibility |
When Can a Specimen Be Prepared Without Resin Mounting?
Resin mounting is not mandatory for every specimen. A sufficiently large, stable component may be prepared directly in a suitable holder if its geometry allows secure, safe clamping and the required edge does not need additional support.
Before omitting mounting, check whether the holder can maintain the preparation plane, prevent movement, and avoid damaging the region of interest.
The decision should follow the specimen and analysis requirements. Avoid adding a mounting operation that provides no useful support—but do not remove it merely to save a few minutes when edge integrity is critical.
Where Mounting Fits in the Preparation Workflow
Sectioning → Cleaning and Orientation → Mounting→ Grinding and Polishing → Examination
For the wider preparation sequence, read our Complete Metallographic Sample Preparation Workflow: From Cutting to Material Analysis.
Hot Mounting vs. Cold Mounting: Which Method Fits Your Specimen?
The first selection question is whether the specimen can tolerate the mounting process. The second is whether the resulting mount will support the required analysis.
Neither method is universally superior.
How Hot Compression Mounting Works
Hot compression mounting places a specimen and mounting compound inside a heated mold. The press applies a controlled combination of temperature, pressure, holding time, and cooling.
Two material categories require distinction:
-
Thermosetting compounds cure into a permanently cross-linked structure.
-
Thermoplastic compounds soften or melt during heating and harden during cooling.
Both involve heat and pressure, but their cooling and demolding requirements are not interchangeable. Cooling thermosetting mounts under pressure toward ambient temperature can substantially reduce shrinkage-gap formation. Thermoplastic materials also require suitable cooling before removal.
How Cold Castable Mounting Works
Cold mounting uses a liquid resin system poured around a positioned specimen and allowed to cure. Depending on the formulation and application, the process may incorporate vacuum impregnation or pressure-assisted curing.
“Cold” does not mean that the specimen remains at room temperature. Polymerization generates heat, and the temperature reached depends on formulation, resin volume, mold geometry, and heat dissipation.
One published mounting discussion reports maximum exotherms of 132°C and 42°C under different insulating and conductive arrangements. Those figures are not universal resin specifications; they demonstrate why the actual mounting arrangement matters when protecting heat-sensitive specimens.
Compare Heat Exposure, Pressure, Edge Retention and Throughput
| Selection factor | Hot compression mounting | Cold castable mounting |
|---|---|---|
| Heat source | External heating during molding | Exothermic curing reaction |
| Pressure exposure | Applied during molding | Depends on the selected process |
| Main controls | Temperature, pressure, hold time, cooling | Mixing ratio, temperature, pot life, curing conditions |
| Edge retention | Depends on compound and cycle | Depends on adhesion, shrinkage, and curing |
| Fragile specimens | Check heat and pressure tolerance | Check exotherm, compatibility, and positioning |
| Porous specimens | Assess suitability case by case | Consider a compatible impregnation resin |
| Capacity | Accepted mounts per cycle | Mold availability and usable cure time |
| Main purchasing question | Can the press repeat the validated cycle? | Can the resin and process preserve the target feature? |
A Practical Decision Tree for Choosing a Mounting Method
Can the Specimen Tolerate the Required Heat and Pressure?
If not, evaluate cold mounting. Then check its curing exotherm rather than assuming that the absence of a heated press eliminates thermal exposure.
For a sensitive electronic assembly, request temperature information under relevant resin volume and mold conditions.
Must the Original Surface Edge Be Preserved?
If the answer is yes, prioritize interface adhesion, low shrinkage, and the behavior of the resin during subsequent preparation.
A fast-curing system is not necessarily a good choice for a very thin coating if the resulting interface gap compromises measurement.
Are Open Pores or Cracks Part of the Inspection Target?
Consider low-viscosity impregnation resin and a compatible vacuum process. Suitable epoxy can enter accessible pores and cracks, supporting the structure during preparation.
However, document that impregnation was used and how resin-filled features will be recognized during analysis.
Is the Bottleneck Curing Time, Operator Time or Batch Capacity?
A laboratory waiting for mounts to cure has a different problem from one spending excessive hands-on time loading and cleaning molds.
Measure the bottleneck before purchasing. The fastest single cycle may not produce the highest number of accepted specimens per shift.
How to Choose Metallographic Mounting Resins
Select the resin around the feature being preserved and the preparation process it must survive.
Material names alone are insufficient. Two products described as “epoxy” can differ substantially in viscosity, working time, fillers, curing temperature, and mechanical behavior.
Hot Mounting Compounds: Phenolic, Epoxy-Based and Transparent Materials
| Material family | Why a laboratory may consider it | What to verify |
|---|---|---|
| Phenolic compounds | Routine preparation and cost control | Edge support, cycle requirements, chemical compatibility |
| Filled epoxy-based compounds | Edge-sensitive preparation | Interface quality, abrasion behavior, compatibility |
| Transparent thermoplastic materials | Visual positioning and specimen location | Cooling requirements and downstream preparation behavior |
| Conductive compounds | Applications requiring an electrical path | Whether the complete mounted arrangement meets the analysis requirement |
Hot mounting conditions are formulation-dependent. Published guidance includes processes around 180°C and approximately 250 bar, but these are examples—not a universal recipe for all powders, presses, or specimens. Use the validated material and equipment instructions.
Cold Mounting Resins: Epoxy vs. Acrylic
| Property to evaluate | Epoxy systems | Acrylic systems |
|---|---|---|
| Main reason to consider | Adhesion, low shrinkage, impregnation suitability | Rapid preparation where formulation and sample are suitable |
| Edge-sensitive work | Often a strong candidate | Must be validated against the edge requirement |
| Vacuum impregnation | Low-viscosity, sufficiently long-working formulations are useful | Short working time or high viscosity can limit suitability |
| Process discipline | Accurate ratio and complete mixing are critical | Follow the specified formulation and mixing instructions |
| Thermal exposure | Evaluate the actual exotherm | Evaluate the actual exotherm |
| Purchasing decision | Cost per accepted specimen | Cost per accepted specimen |
Epoxy systems are widely used because they adhere to specimens, have relatively low shrinkage, and can enter cracks and pores when appropriately formulated. Acrylics are generally less suitable for vacuum impregnation when viscosity is high and working time is short.
This does not make acrylic unsuitable for all metallographic preparation. It means that speed should not override the analytical requirement.
Resin Hardness vs. Abrasion Resistance: Why They Are Not the Same
A hardness value does not, by itself, prove that a resin will protect an edge during the laboratory’s grinding and polishing process.
The practical question is how the resin and specimen behave together during material removal. A mount may feel hard yet still produce an unacceptable prepared interface.
When comparing mounting compounds, use the same representative specimen, preparation sequence, and inspection method. Examine the final edge—not only the cured resin.
When Do You Need Clear or Conductive Mounting Materials?
Clear Resins for Positioning and Targeted Cross-Sectioning
Transparent materials can help locate small components and track a target feature during preparation. This can be useful where the required section passes through a narrow interface or miniature assembly.
Visibility is a process aid, not a substitute for orientation records and controlled material removal.
Conductive Materials for Electron Microscopy Applications
Where electrical conductivity is required, assess the entire path between the specimen, mounting material, holder, and instrument.
Do not assume that a conductive mounting compound automatically eliminates every charging problem or replaces all other specimen treatments.
What to Request from a Mounting Resin Supplier
Before approving a metallographic mounting resin, request:
-
Technical data sheet and safety data sheet.
-
Mixing ratio, explicitly identified as mass or volume.
-
Working time and recommended curing conditions.
-
Conditions under which the mount is ready for grinding.
-
Exotherm information and test conditions.
-
Viscosity and relevant property test methods.
-
Recommended hot mounting cycle, where applicable.
-
Storage conditions and shelf life.
-
Batch identification and traceability.
-
Application guidance for the actual specimen.
For material selection, compare our metallographic mounting resins against your specimen type, edge-retention requirement, and preparation schedule.
How to Preserve Edges and Prevent Resin–Specimen Gaps
Edge retention must be designed into the workflow before mounting begins.
A coating can remain physically attached to a specimen yet still become unsuitable for measurement if its edge is rounded or insufficiently supported.
Why Edge Retention Matters for Coatings and Surface Layers
Edge integrity matters when evaluating:
-
Coating and plating thickness.
-
Surface-treatment layers.
-
Decarburized regions.
-
Coating–substrate interfaces.
-
Thin walls and edge defects.
-
Surface-adjacent cracks.
Mounting and polishing must work together. A suitable resin cannot compensate for an excessively aggressive preparation method.
What Causes Shrinkage Gaps at the Specimen Interface?
Potential contributors include:
-
Polymerization shrinkage.
-
Different thermal contraction of specimen and resin.
-
Surface contamination.
-
Poor adhesion.
-
Inappropriate cooling or demolding.
Hot ejection followed by rapid water cooling can cause the metal to pull away from the mounting compound because of different contraction rates. Controlled cooling under pressure reduces this risk.
Build an Edge-Retention Strategy Before Mounting
Clean and Dry the Specimen Without Damaging the Feature
Remove contamination that interferes with adhesion, but preserve evidence relevant to the investigation.
For example, a cleaning procedure acceptable for routine incoming inspection may be inappropriate when corrosion products or residues are part of a failure investigation.
Select a Suitable Low-Shrinkage, Edge-Retention Resin
For cast systems, epoxy is often a useful starting candidate because of its adhesion and comparatively low shrinkage. Confirm performance through a representative specimen trial.
Control Cooling or Cure Conditions
For hot mounting, validate heating, holding, cooling, and demolding.
For cold mounting, control mixing ratio, resin temperature, working time, pour volume, and curing conditions.
Verify the Edge After Grinding and Polishing
Inspect the same type of feature that will be measured in routine production. A sound-looking outer mount does not demonstrate a sound microscopic interface.
Mount Size, Specimen Spacing and Resin Volume
There is no single mount-to-specimen ratio that resolves every application.
Choose dimensions by checking:
-
Resin coverage around the specimen.
-
Clearance from mold walls.
-
Required preparation depth.
-
Compatibility with the grinder-polisher holder.
-
Spacing between multiple specimens.
-
Heat generation and dissipation during curing.
-
Ability to identify each specimen independently.
Reducing resin volume may lower material use, but excessive crowding can compromise positioning, support, and preparation consistency. Conversely, a large pour can change curing heat exposure. Published exotherm comparisons show why geometry and heat transfer must be considered alongside formulation.
Vacuum Impregnation and Pressure-Assisted Cold Mounting
Vacuum impregnation and pressure-assisted curing address different problems. They should not be treated as interchangeable labels.
When Is Vacuum Impregnation Useful?
Vacuum impregnation is worth evaluating when accessible pores, cracks, or fragile structures need additional support.
Examples include porous materials, thermal-spray coatings, and specimens where unsupported features may be lost during preparation.
Low-viscosity epoxy can enter accessible pores and cracks; sufficient working time is necessary to complete the process before viscosity rises.
Vacuum Impregnation vs. Pressure Curing
| Process | Main purpose | What to verify |
|---|---|---|
| Vacuum impregnation | Remove air from accessible spaces and facilitate resin entry | Penetration into the target region |
| Pressure-assisted curing | Control bubble behavior during curing | Suitability of resin, equipment, and process |
| Unassisted casting | Encapsulate specimens where additional processing is unnecessary | Interface quality and absence of interfering voids |
Vacuum-assisted and pressure-assisted methods are available for cold mounting, but the selected process must suit the resin and specimen rather than being added automatically.
Why More Vacuum Is Not Always Better
Do not select the lowest attainable chamber pressure as a universal target.
Use a validated resin–equipment procedure and distinguish absolute pressure from gauge pressure. The relevant questions are whether air is removed from the target structure, resin enters the accessible spaces, and the process remains stable within the resin’s working time.
A vacuum system should be assessed as a complete method with the selected resin—not merely by pump specifications.
What Impregnation Can—and Cannot—Tell You About Porosity
Impregnation supports features; it does not eliminate the need for a valid porosity-analysis method.
The report should explain:
-
Which resin was used.
-
Whether the specimen was impregnated.
-
How resin-filled pores are distinguished from solid material.
-
How mounting bubbles are excluded.
-
Which regions were evaluated.
Do not interpret incomplete resin penetration as proof of absent porosity. Closed or inaccessible features may not communicate with the resin.
Step-by-Step Metallographic Mounting Procedures
The procedures below provide a process framework. Exact temperatures, pressures, ratios, and curing times must come from the applicable resin and equipment instructions.
Before Mounting: Check the Specimen, Orientation, and Preparation Goal
Confirm:
-
Specimen identification and analysis objective.
-
Required examination plane.
-
Heat and pressure sensitivity.
-
Condition after sectioning.
-
Cleaning and drying method.
-
Mold and holder compatibility.
-
Resin availability and shelf-life status.
Mounting cannot restore a coating or microstructural feature already damaged during sectioning. Review our Metallographic Cutting Guide: How to Select Machines, Wheels, Coolants and Cutting Parameters before embedding specimens with burns, cracks, or delamination.
Hot Compression Mounting Procedure
Position the Specimen and Load the Compound
Place the specimen so the required surface can be exposed without unnecessary material removal. Use an appropriate quantity of compound and maintain the required specimen position.
Apply the Specified Temperature, Pressure and Hold Time
Select the validated program for the mounting compound and specimen.
Pressure terminology requires care: hydraulic system pressure and pressure applied to the mold contents are not automatically the same value. Confirm what the machine displays and how it relates to the supplier’s instructions.
Cool Under the Required Conditions
Complete the specified cooling stage before demolding. Controlled cooling under pressure is particularly important for reducing interface-gap formation.
Demold, Identify and Inspect the Mount
Check identification, geometry, surface defects, and specimen position. Reject or investigate visibly defective mounts before consuming grinding and polishing time.
Cold Castable Mounting Procedure
Confirm the Mixing Ratio and Working Conditions
Verify whether the specified ratio is by mass or volume. Do not convert between them without the required density information or supplier approval.
Record ambient conditions when they influence working and curing behavior.
Mix Carefully and Position the Specimen
Mix according to instructions, including material at the sides and bottom of the container. Position the specimen before the working window becomes too short.
Pour and Apply Assisted Processing Where Appropriate
Pour in a controlled manner. Apply vacuum or pressure assistance only through a suitable procedure using appropriately rated equipment.
Allow Full Cure Before Grinding
A mount that can be removed from a mold is not necessarily ready for grinding. Follow the stated preparation-ready condition rather than judging only by surface firmness.
Demold, Label and Check the Interface
Inspect for tackiness, major voids, movement, incomplete encapsulation, and orientation errors.
Using Mounting Clips and Preparing Multiple Specimens
Metallographic mounting clips help position small specimens, but their placement must not obscure the analysis region or interfere with material removal.
For multi-specimen mounts:
-
Keep individual identities traceable.
-
Maintain the required orientation.
-
Plan the common examination plane.
-
Leave adequate resin support.
-
Check that one specimen does not obstruct another.
-
Validate the complete mount through grinding and polishing.
Use mounting clips and molds that fit the specimen geometry and the laboratory’s preparation fixtures.
How to Choose a Metallographic Mounting Press
A mounting press should be selected against a validated application, not simply the highest temperature, pressure, or advertised capacity.
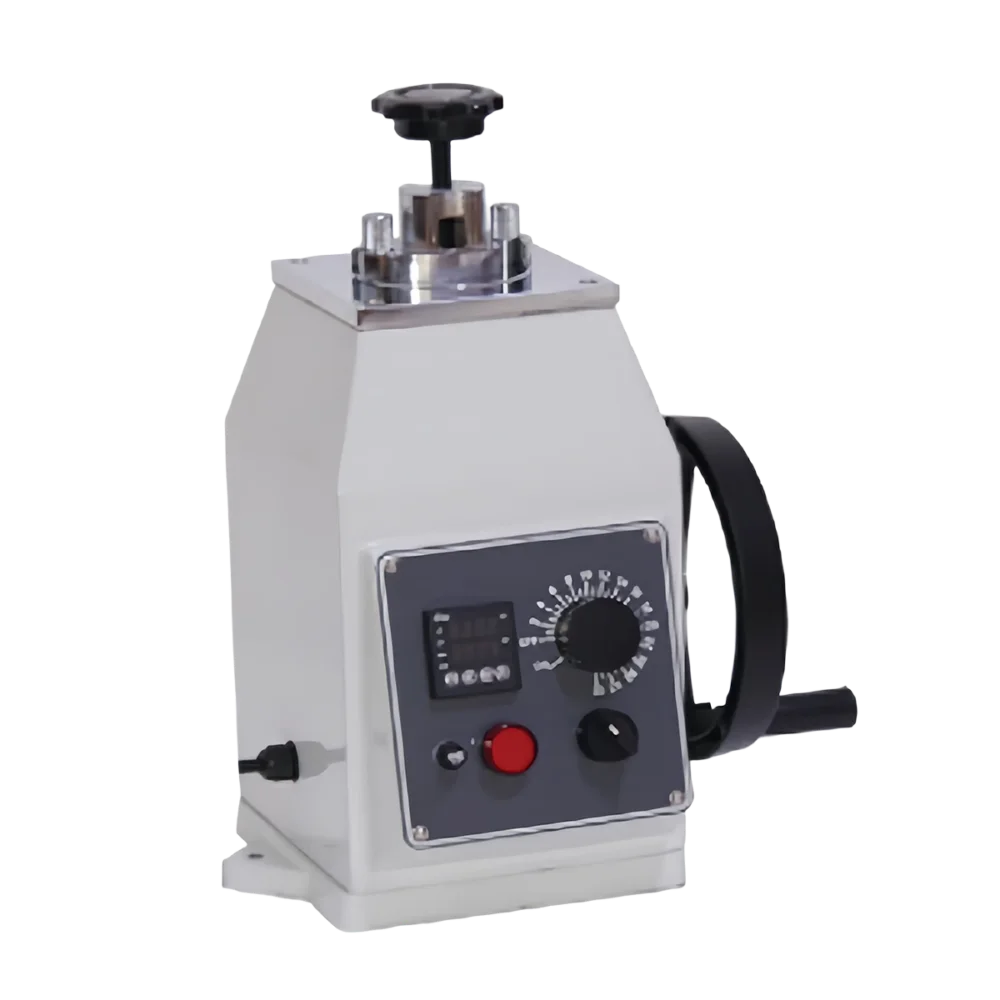
Match Mold Diameter and Usable Chamber Geometry to Your Samples
Specify:
-
Required finished mount dimensions.
-
Maximum specimen height.
-
Necessary resin coverage.
-
Compatibility with polishing holders.
-
Mold-change requirements.
-
Access for loading and removal.
The nominal mold diameter does not describe all usable specimen space.
Evaluate Temperature, Pressure, and Cooling Control
Ask how the press controls and records the parameters that matter to the selected compound:
-
Heating conditions.
-
Pressure application.
-
Hold time.
-
Cooling.
-
Demolding readiness.
-
Alarms and interlocks.
Request clarification of pressure definitions, units, and control limits before comparing machines.
Single-Mount, Multi-Mount, or Multi-Cylinder Capacity?
Compare accepted mounts per cycle and per shift.
A configuration that physically accommodates more material may not improve useful output if it increases loading time, cooling time, identification errors, or rework.
Compare Operator Time, Utilities, and Maintenance
Include:
-
Loading and unloading.
-
Mold cleaning.
-
Compound handling.
-
Water, electricity, and other utility requirements.
-
Consumable parts.
-
Service access.
-
Training.
-
Spare-parts availability.
For a procurement comparison, review our metallographic mounting presses against your required mount dimensions, validated materials, and daily workload.
When Should You Buy a Cold Mounting or Vacuum System Instead?
A laboratory dominated by fragile, temperature-sensitive, or porous specimens may gain more from an appropriate cold mounting setup than from additional hot-press capacity.
The correct investment follows the sample mix.
| Laboratory requirement | Configuration to evaluate | Evidence to request |
|---|---|---|
| Repetitive metal specimens | Programmable hot mounting press | Trial mounts and actual usable cycle |
| Heat-sensitive assemblies | Controlled cold mounting setup | Relevant curing-temperature evidence |
| Porous coatings | Compatible impregnation system | Prepared sections showing support |
| High specimen volume | Batch or multi-cylinder configuration | Accepted output and hands-on time |
| Frequent material changes | Flexible equipment and method support | Changeover and cleaning assessment |
Common Metallographic Mounting Problems and How to Fix Them
Troubleshooting should separate material, specimen, process, and downstream preparation causes.
Why Is There a Gap Between the Resin and Specimen?
Investigate contamination, resin shrinkage, adhesion, curing conditions, and thermal contraction.
For hot mounts, review cooling and demolding. For cold mounts, review resin selection, ratio, mixing, and cure conditions. Epoxy adhesion and lower shrinkage are reasons to consider it for gap-sensitive cast mounting.
How Can You Prevent Bubbles and Voids in Cold Mounting?
Check mixing and pouring technique, wetting, accessible cavities, working time, and the suitability of assisted processing.
Avoid changing several variables simultaneously. Prepare a controlled trial so the cause of improvement can be identified.
Why Is the Mount Soft, Sticky or Bulging?
For cast systems, check ratio, mixing completeness, temperature, age, and curing time.
For compression mounting, verify the actual heating and holding stage. Soft or bulging mounts can result from insufficient time at the required temperature.
Why Does the Mount Crack During Cooling or Grinding?
Investigate thermal history, specimen geometry, local stress, material compatibility, and preparation forces.
A crack first noticed during grinding may have originated earlier. Inspect mounts before preparation so the point of failure can be narrowed down.
Why Does the Coating Edge Still Round After Mounting?
Review both mounting and polishing:
-
Is there an interface gap?
-
Is the specimen adequately supported?
-
Is the preparation method too aggressive?
-
Is differential material removal creating relief?
-
Is the chosen polishing surface appropriate?
Do not replace resin repeatedly without examining the complete preparation method.
How to Verify Mount Quality Before Releasing a Specimen for Analysis
Quality verification should occur before grinding and again at the prepared examination plane.
Inspect the Mount Before Grinding
Confirm:
-
Correct identity and orientation.
-
Suitable dimensions.
-
Complete cure.
-
Stable specimen position.
-
No major cracks or interfering voids.
-
Adequate fixture engagement.
Inspect the Prepared Edge Under the Microscope
Examine the actual target region for interface gaps, coating continuity, rounding, pull-out, contamination, and unsupported features.
A photograph of an intact exterior is not sufficient evidence for an edge-sensitive application.
Define Application-Specific Acceptance Criteria
Avoid a universal claim such as “all acceptable mounts must have gaps below a single fixed value.”
Acceptance depends on the feature size, measurement method, customer requirement, and intended conclusion.
A preparation condition acceptable for broad phase observation may be unacceptable for a thin coating measurement.
Record the Parameters Needed for Repeatability
| Record field | Purpose |
|---|---|
| Specimen ID and material | Traceability |
| Examination plane | Orientation control |
| Resin and batch | Material consistency |
| Mold size | Geometry and process context |
| Ratio or press program | Process repeatability |
| Cure and cooling conditions | Thermal history |
| Inspection result | Acceptance evidence |
| Rework reason | Improvement data |
What Is the Real Cost per Acceptable Metallographic Mount?
The useful purchasing metric is not resin price per kilogram or the press’s shortest advertised cycle. It is the cost of producing a specimen that meets the laboratory’s preparation requirement.
Compare Total Cost, Not Resin Price Alone
Include resin, molds and accessories, labor, utilities, equipment allocation, maintenance, and mounting-related rework.
If a mount fails only after polishing, the loss includes the downstream work already invested.
Use First-Pass Yield and Accepted Mounts per Shift
An Illustrative Purchase-Justification Example
The following figures are hypothetical. They demonstrate a calculation method, not an industry benchmark or a claimed customer result.
Assume two trial workflows each prepare 100 mounts:
| Trial measure | Workflow A | Workflow B |
|---|---|---|
| Mounts prepared | 100 | 100 |
| Accepted without rework | 85 | 95 |
| Materials and consumables | $100 | $150 |
| Operator labor | $250 | $200 |
| Allocated equipment, utilities and maintenance | $50 | $100 |
| Total trial cost | $400 | $450 |
| First-pass yield | 85% | 95% |
| Cost per first-pass acceptable mount | $4.71 | $4.74 |
Workflow B is not automatically cheaper: its first-pass cost is slightly higher. However, it produces ten more acceptable mounts from the same number attempted.
Now assume each rejected mount requires $8 of additional downstream and remounting work, and all are subsequently recovered:
| Additional calculation | Workflow A | Workflow B |
|---|---|---|
| Reworked mounts | 15 | 5 |
| Added rework cost | $120 | $40 |
| Total cost after recovery | $520 | $490 |
| Final accepted mounts | 100 | 100 |
| Cost per final accepted mount | $5.20 | $4.90 |
Under these assumptions, Workflow B saves $30 per 100 accepted mounts. The result changes if resin cost, labor, rejection rate, or recovery success changes.
This is the purchasing lesson: measure the whole workflow. A higher-priced resin or equipment configuration needs application evidence, not a generic claim of efficiency.
Run a Sample Trial Before Placing an Equipment Order
Use specimens that expose the real risks:
-
The thinnest coating.
-
The most fragile assembly.
-
A representative routine part.
-
A porous or difficult-to-support material.
-
The highest-volume specimen family.
Evaluate the final prepared section, accepted output, operator time, and consumable use. Do not approve a mounting solution solely from a demonstration on an easy specimen.
Metallographic Mounting FAQ
Does Every Metallographic Specimen Need Mounting?
No. Direct preparation may be appropriate when a specimen can be held securely, and the target feature does not require additional resin support.
Is Cold Mounting Completely Free of Heat?
No. Curing generates heat. Formulation, resin volume, mold geometry, and heat transfer affect specimen exposure.
Which Mounting Resin Is Best for Coating Edge Retention?
A low-shrinkage system with suitable adhesion and preparation behavior is a strong candidate. Cast epoxy commonly provides better edge retention than cast acrylic, but the actual coating and polishing method must be tested.
Can Acrylic Resin Replace Epoxy for Every Application?
No. Working time, viscosity, shrinkage, adhesion, and impregnation requirements differ. Choose based on the inspection task rather than treating the materials as interchangeable.
When Is Vacuum Impregnation Necessary?
Consider it when accessible pores or cracks require resin support that ordinary casting does not provide. Confirm benefit through a prepared cross-section.
How Long Should a Cold Mount Cure Before Grinding?
Use the resin’s specified preparation-ready condition. Surface hardness or successful demolding alone does not establish complete readiness.
Can Several Specimens Be Mounted Together?
Yes, if orientation, identification, spacing, support, and the common preparation plane remain controlled.
What Is the Next Preparation Step After Mounting?
Normally, grinding, followed by polishing. For the relationship between these stages, read our Complete Metallographic Sample Preparation Workflow: From Cutting to Material Analysis.
Choose a Mounting Method Around Your Specimen—not the Other Way Around
A reliable mounting solution begins with the specimen’s limitations and the evidence the laboratory needs to preserve.
Establish heat and pressure tolerance first. Define the edge, interface, or pore structure that must survive preparation. Then select the resin, equipment, and process controls. Finally, verify the prepared surface and calculate cost per accepted specimen.
This approach connects mounting decisions to laboratory performance: fewer avoidable preparation failures, clearer acceptance decisions, and a more defensible basis for equipment and consumable purchasing.
Request a Mounting Recommendation for Your Application
Need to choose between hot compression mounting and cold mounting—or resolve gaps, bubbles, and poor edge retention? Send us your specimen material, dimensions, target feature, and daily sample volume. We can help evaluate suitable mounting methods, resins, and equipment for your preparation requirements.
For a useful technical inquiry, include:
-
Material and component type.
-
Specimen dimensions.
-
Photograph or sketch of the required section.
-
Coating, layer, pore, or interface of interest.
-
Known temperature or pressure restrictions.
-
Current resin and process.
-
Photographs of the defect after preparation.
-
Daily specimen volume and existing holder dimensions.